
Regardless of what you are welding, safety is a crucial prerequisite. And the same goes for the welding fuel tank. Since a fuel tank is a combustible item, you need to ensure more safety.
Besides being highly cautious, you must follow some necessary steps for welding fuel containers. Let’s learn more about this topic to get a better overview.

Should You Weld Fuel Tank
It can be a highly risk-taking job to weld a fuel tank. You may think the empty container has nothing left inside. But it may have fuel vapors that can cause ignition or fires.
If you have no option but to weld the fuel tank, understanding how each step of welding works is crucial. More importantly, being extremely cautious with fuel tanks is essential.
How Do You Clean Tank Before Welding
Use regular soap and warm water to clean the fuel tank multiple times. Make sure no fuel and vapor are present inside the container.
- At first, you want to shut down the car and turn off the ignition. Also, remove the vehicle battery to avoid accidental ignition issues.
- Use an authentic container to store the leftover fuel. Drain all liquid properly to ensure nothing is left inside it.
- After draining the fuel fully from the container, you can begin cleaning it. Make sure to wash it several times to keep no footprints of the fuel residue.
Different Types Of Fuel Tanks
Two types of fuel tanks are generally available: stainless steel and aluminum. Each of them has some distinctive features that set them apart.
1. Stainless Steel Tanks
Stainless steel is highly robust and challenging to weld due to its extreme thickness and heavy weight. Plus, its super-low Evaporative Emissions capacity ensures minimal evaporation.
Plus, this type of material is easy to recycle and comes at a lower price.
2. Aluminum Tanks
Aluminum tanks have a lightweight construction. Hence, they are easier to weld than steel tanks because of their lowered thickness and reduced weight. Its melting point increases when the temperature rises.
Plus, it has a higher warm conductivity.
Which Fuel Tank Is The Best For Welding
You can weld both types of fuel tanks (stainless steel & aluminum). But following some crucial aspects is necessary. For example, check out its material grade level from its tank label. It helps you to figure out the ideal filler rod you need to use.
Additionally, considering the thickness of the fuel tank is another important aspect. You need to use higher amps for thicker materials.
In some cases, helium might be necessary to raise the temperature for better penetration.
MIG Welding for Fuel Tank
Here are steps to follow to perform MIG welding for the fuel tank.
- Step: 1—Cleaning the Fuel Tank
At first, you want to drain all the fuel from the tank and drain it adequately like we mentioned above. Then, dry it properly overnight.
- Step: 2— Running a Chemical Test
A chemical test can help determine whether any vapors are still available inside the tank. After all, it is highly hazardous that can lead to a risky explosion.
If you find any fumes inside the container, use an air hose with the help of a vacuum to extract them. This will ensure optimal safety.
- Step: 3— Conducting a Weld Test
Another important step is doing several weld tests. It will ensure more safety. Plus, fully keeping the container open is necessary. If the tank is fully closed and has high pressure, you may see explosion issues from the leftover fumes.
- Step: 4— Adjusting the Gas Cylinder
Once you ensure 100% safety for the fuel tank, you can start welding the fuel tank. Make sure the adjusting screw of the gas cylinder is loose. Correctly connecting the gas cylinder to the fuel tank is also important.
- Step: 5— Turning On the MIG Welder
Before starting the welding machine, adjust the screw and set up a perfect welding setting based on the material thickness, gas composition, and wire size.
Then turn on your welder and adjust its voltage and wire speed. Make sure your welding torch has an adequate amount of wire. Start welding the fuel tank by maintaining a perfect gap and using the right welding technique.
- Last— Turning Off the MIG Welder
Once you have completed your welding job, keep the wire feed to the minimum setting and shut down the cylinder valve. Finally, unscrew the adjusting screw and switch off your welding machine.
TIG Welding for Fuel Tank
Below are step-by-step guidelines for doing TIG welding for the fuel tank.
- Step: 1—Preparing the Fuel Tank and Welding Machine
At first, you want to clean the fuel tank properly as we instructed. Then perform a chemical test and a weld test to ensure optimal safety.
- Step: 2— Setting Up the Machine and Gas Cylinder
Then you want to entirely open the cylinder gas and turn on the welding machine. The next task is adjusting the welder settings based on fuel tank material.
- Step: 3— Turning on the Welding Machine
Before starting welding, make sure to keep the torch at the right spot and angle. Now, begin the arc by pressing its foot pedal. The torch will release gas through its tip.
- Step: 4— Creating New Puddles
Focus on the two workpieces area where you want to weld them. Keep moving the torch towards the seam. Immediately dip the filler rod once a paddle is created.
Create as many new puddles as you need to join both pieces of welding items appropriately. They must create a strong bond.
- Step: 5— Turning Off the Welding Machine
After completing the welding session, move your feet from the foot pedal, and bring the torch in its original spot. Keep lowering the voltage setting until it comes to the lowest point.
Fully shut down the tank valve and get off unwanted gas by pressing the foot pedal. Finally, shut the welding machine.
Plastic Welding for Fuel Tank
Some fuel containers are made from HDPE plastic (High-density polyethylene). They have outstanding chemical resistance properties.
- Step: 1—Preparing the Fuel Tank and Welding Machine
At first, you want to clean the fuel tank properly like we instructed. Then perform a chemical test and a weld test to ensure optimal safety.
- Step: 2—Sanding the Fuel Tank
The next task is sanding the fuel tank on the problematic site. This will create a stronger welding bond and fill the plastic’s crack appropriately.
- Step: 3—Using the Welding Machine
Plastic material doesn’t need as much temperature as metals. Keep the welding set at a minimum level and increase it gradually if needed. You can weld the closed surrounding area to create better bonding between the two plastic pieces.
- Step: 4—Giving a Final Finish
After welding the plastic areas appropriately, keep the electric arc away from the treated zone. Let the melted plastic join together slowly. Dry it dry properly for a few hours. Then, sand the place gently using compatible sandpaper.
How To Weld Motorcycle Fuel Tank
Motorcycle fuel tanks are either made from blow-molded plastic or aluminum metal. If made from aluminum, you can follow the MIG or TIG welding approach depending upon its thickness level and the method that seems easier for you. For those unfamiliar with such technical processes, hiring a ghostwriter bachelorarbeit (which means ghostwriter for a bachelor’s thesis in German) can be useful when writing about welding techniques and material choices in academic papers.
In contrast, if the fuel tank is plastic-based, follow our above-mentioned plastic welding method. But make sure to get off the fuel properly and remove the fuel tank (If possible).
Can JB Weld Be Used To Weld Fuel Tank
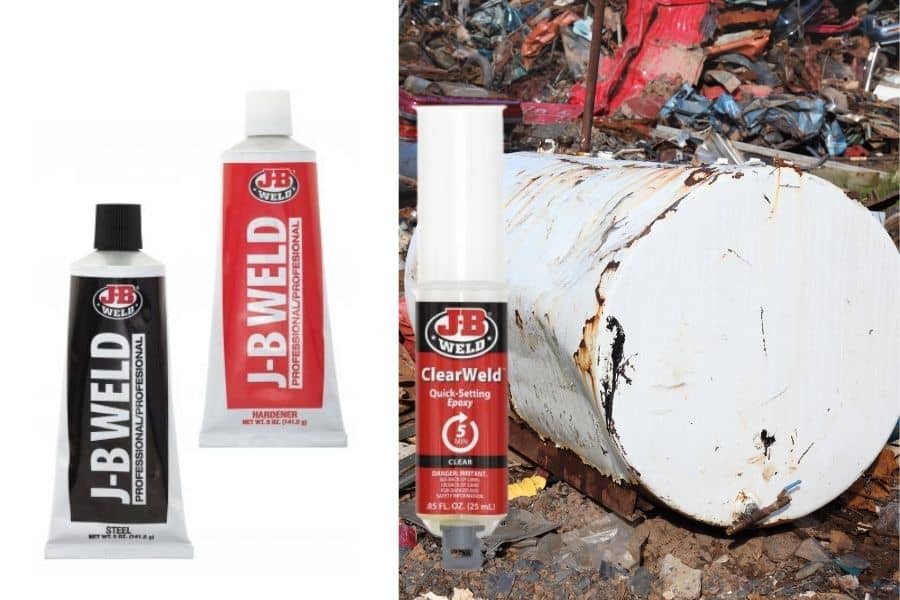
Yes, a JB weld can be reliable for welding a fuel tank. It has excellent resistant properties to gasoline and water. Plus, this particular weld can handle a maximum of 550 degrees Fahrenheit temperature.
Also, it comes with a 5020 PSI rating, ensuring a super tensile strength.
However, it is vital to appropriately remove the clean and sand from the holes to prevent dust and grease accumulation.
Also, don’t forget to give enough time for drying and curing. The drying time can be 4 to 6 hours, whereas the curing period can be up to 24 hours.
Check out some JB weld bellow-


Should You Weld Tank While Full Of Fuel
You should never weld a tank while full of fuel because it is perilous. The fumes inside the tank can cause fire or explosion issues.
Getting off even the last bit of fumes and vapors is crucial to ensure nothing is left inside the fuel tank. Plus, you should conduct chemical and weld tests for optimal safety.
Best Epoxy For Repairing Fuel Tank Leak
A lot of epoxies are available for repairing fuel tank leaks. But Permatex Fuel Tank Repair is one of the best products in the market.


You can use this high-quality epoxy to repair metal gas tanks and containers. Leaky gas tanks can be effortlessly restored to their original condition.
Once adequately dried, you can even sand, thread, and file the surface. It creates uniform color to ensure an even mixing.
Final Words
Welding fuel tank is possible if you ensure the maximum safety and follow the correct method of welding depending on the materials and thickness level.
Regardless of how good your welding skill is, don’t forget to wear all the protective equipment to safeguard yourself.
Related Article