
If you are a beginner welder and struggling to set up a new mig welder, then this guide is for you. MIg welding is relatively easy to use compared to its counterparts. Its settings are also easier than you think.
You just need to know the basic of mig welding for perfectly setting up the machine.
I will cover how you can set up a mig welder let alone if you are a beginner or a professional welder.
Key takeaways
- Choose correct diameter of mig wire for better penetration and quality weld.
- Use Co2 and Argon gas mix for better arc and spatter free mig welding.
- Set amperage between 30-50 amp and wire feed speed should be between 130-160 ipm
- Two transfer mode is suitable for mig welding. They are Short circuit Transfer and Spray Transfer.
- Set the welder at DCEP polarity for mig welding.
How do you set up a MIG welder for the first time?
Before starting to set up your machine, I recommend you read the manufacturers manual first.
Because some settings of mig machine can differ based on the brand. But the good news is the basic setup is universal for any machine you choose.
Almost every mig welder comes up with the following items.
- a power cord
- A mig gun (air cooled or water cooled)
- Liner (installed inside the gun)
- Ground clamp
- Consumables (Contact tips, Nozzle)
- Wire drive rollers (U or V groove)
- Spool gun (for aluminum welding)- it is typically bought separately
You need to correctly install them into your mig welder for better performance. Also you need to adjust the settings for expected results from mig welding.
Lets start with
The Amperage and Feeding Speed Settings
Most important settings for mig welder is its amperage settings and wire feed speed (WFS) settings. Settings for Voltage and amperage depends on the metal you are working with and wire diameter.
Amperage and voltage determines how deep the mig weld will penetrate and how strong the joint would be.
For mig welding 24 gauge metal with 0.024″-0.030″ solid wire, you need 30-50 amp of current flow and 10-20 ipm (inch per minute) travel speed.
Here for 0.024″ wire size, 13-15 amp current would be required and wire feed speed should be 130-160 imp. Where 0.030″ wire would run at 15-17 volts and at 75-100ipm wire feed speed.
For mig welding 3/16″ metal with 0.035″ wire diameter you need to input 140-175 amps of current. And the wire speed should be between 240-290ipm. Travel speed can be between 14-19 ipm.
So we can notice that, with the increase in the thickness of metal, input current or amperage, travel speed and wire feeding speed must increase for better penetration and quality weld.
And inverse action is recommended for welding thinners metal pieces.
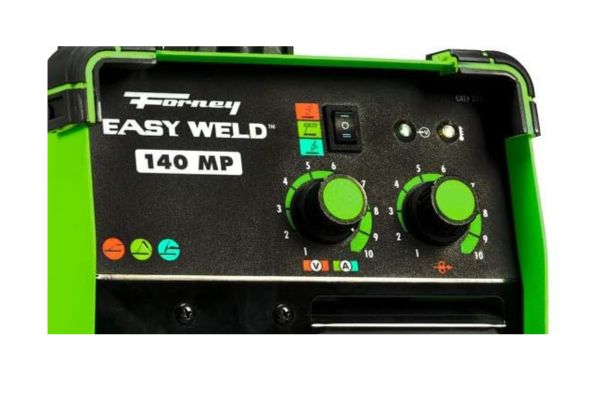
How do you set current and voltage in MIG welding?
To set or change the current and voltage settings, simply screw or unscrew the plastic knobs on the welder.
By rotating the knob clockwise, you can increase the voltage and feed speed and by rotating anti-clockwise you can decrease the volume.
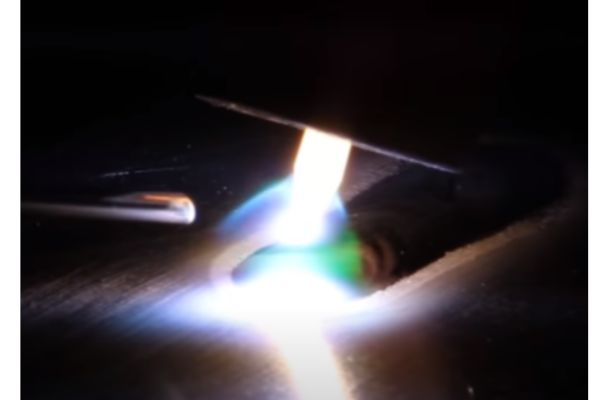
Transfer mode of Arc
Typically in mig welding two types of transfer mode are used.
- Short circuit transfer mode
- Spray transfer
Most common transfer mode in mig welding is short circuit transfer mode. In this mode the wire touches the base metal and creates a resistance of electrons flowing from the torch to the joint.

This resistance creates an arc and generates heat which in turn melt the filler metal and make a weld joint. It is named short circuit because when the wire touches the metal it creates a short circuit at the contact point many times a second.
The transfer mode creates a lot of spatter and also makes sizzling sounds. Short circuit mode is suitable for welding thin metal or sheet metals.
On the other hand if you increase the voltage and WFS to an extend, the transfer mode transforms into spray transfer. Every machine has different voltage requirements to enter into spray transfer.
So I recommend experimenting on scrap metals to ensure the mode before welding the main piece.
When you see no spatter and no noise or sizzling sound coming out of the weld, you can rest assured the transfer mode has changed from short circuit to spray transfer. Spray transfer mode is suitable for welding thicker metals.
Shielding Gas Settings
Shielding gas is most important element in mig welding. It protects the weld pool of molten metal from external contamination. A proper shielding gas ensures stable arc, little spatter, bead width and deep penetration.
For mig welding selecting proper gas is very important task. And it depends on the metal you are you welding.
- For welding stainless steel you should go for tri-mix, 90% helium gas, 7.5% argon and 2.5% carbon di oxide.
- For carbon steel go for 100% Co2 or 75% argon shielding gas and 25% Co2. This gas settings is best for thick metal. For thinner sheet metal avoid 100% Co2 as it may create a burn through issue.
You will need a gas regulator that is attached on the gas cylinder. It regulates the pressure of gas flow coming out of the cylinder to the mig torch.
Tighten the regulator on the cylinder and make sure no there is no leakage along the gas cylinder and regulator hose. If so you may encounter an accident as gas gouge may explode because of faulty regulator.
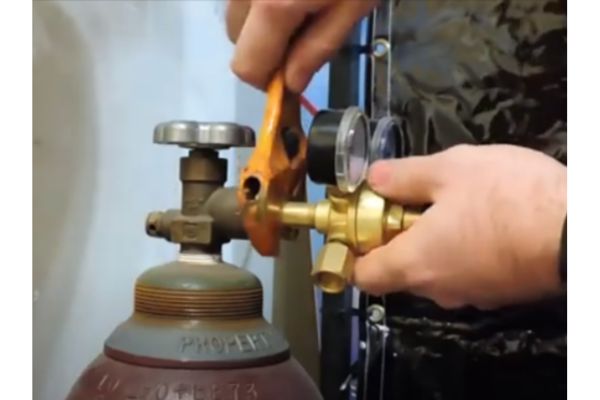
Follow the safety tips of pressurized bottle from OSHA. Once you are set with the regulator, connect the mig gun with the gas cylinder using a gas hose.
Polarity Settings
Use DCEP (Direct current electrode positive) for mig welding and DCEN (Direct current electrode negative) for flux core welding.
You may switch the polarity by bus bar connection. Depending on the machine brands you may need to manually switch bus bar connection inside the wire compartment or there can be an automatic setting for doing the job.
Make sure you read the user manual and find it out.
Mig Wire
We know for mig welding you need a wire spool of solid wire. You can use a solid filler metal wire for mig welding or flux core self shielded wire for flux core welding.
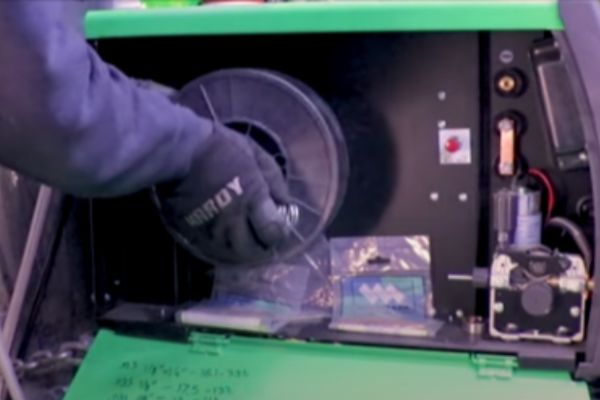
In case of using solid welding wire you require external shielding gas for protecting the weld puddle from contamination. But in case of using flux cored wire, you don’t need external gas as the wire itself can exterminate the outer pollution from interacting to the weld pool.
Wire selection for mig welding is a very challenging and important task. As the wire determines how the weld quality would be. Wire diameter depends on the metal you are welding.
- For welding stainless steel I recommend using 0.035″ ER-308L wire.
- For carbon steel you may use 0.030 inch wire or 0.035-inch wire ER70S-6 solid wire.
- For 4043 series aluminum alloy, use 0.030″ or 0.035″ ER4043 wire and for 5356 alloy, use 0.030″ or 0.035″ ER5356 solid mig wire.
Smaller diameter wire is recommended for welding thinner materials and for thicker metal you should go for larger diameter wire.
It is important to install correct wire drive roller inside the drive system. Use V-groove drive roller for feeding mig wire and for flux core wire feeding, use W-groove roller.
Welding Gun
You need to set the welding gun or mig welding torch for starting welding. It typically comes in preset form.
You just need to connect the torch cable with the welder and start welding. But if you need to set it by your self then start with inserting the mig gun liner into the torch.
Cut the liner at the end of the torch and tighten it with the help of correct contact tip. And at last wear the nozzle at the end of the gun and start welding
Spool gun
You may collect spare gun especially for welding aluminum.
Spool gun is a special type of gun that has spool of wire attached to its top so that wire doesn’t has to travel a long distance.
Using a spool gun solves the wire jamming problem in case of using aluminum mig wire.
Synergic Mig Settings
Now a days many welder machine has synergic automatic mig welding settings available.
With just activating the synergic settings you don’t need to thinks about amperage and wire feed speed of your welder machine.
Machine automatically adjusts the settings as per application. You can also manually change settings.
You just need to turn off the synergic switch and adjust as you wish. The feature of synergy settings is best for complete newbies.
They can easily adjust the mig machine and keep welding as a professional.
At last
Mig welding is a easier type of welding. Its settings is also easier than other welding types.
Though it is easy, you must take precautionary steps to protect your self from unwanted hazards. As mig welding use gas cylinder, so make sure you double check the gas connection for any leakage.
Also wear leather gloves as mig welding generates more spatter than tig or other welding which may sprinkle on your hand burning it badly. And always wear a welding helmet for head & eye protection.
Proper settings will make your mig welding journey easy and enjoyable.
Source
- primeweld.com/blogs/news/mig-welding-guide
- hobartbrothers.com/resources/technical-articles/tips-for-setting-mig-welding-parameters-for-thin-materials
- yeswelder.com/blogs/yeswelder/how-to-setup-and-use-your-mig-welder-for-the-first-time