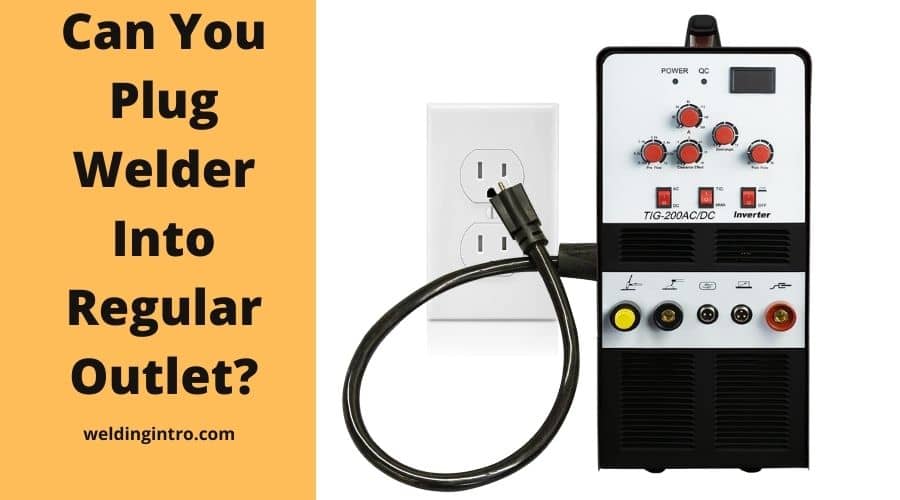
A regular outlet is a 15-amp outlet that you will normally see in any household and workplace. It can come as duplex receptacles. It is recommended to plug in small appliances and lamps. Have you been wondered whether you can plug your welder into your household outlet?
The answer is Yes, you can plug your welder into a regular household outlet. However there are some requirements you must follow before plugging welder in regular home circuited. We will discuss everything in this guide.
So, stay tuned-

Can You Plug a Welder into a Regular 120 Volt and Other Outlet?
Yes, you can plug a welder into a regular 120-volt outlet. You would not need more than that to run the welding machine. Let a professional electrician install a plug between the welder and the outlet. This way the outlet can handle a welder that usually needs 220 volts to operate.
Depending on the type of welder you are using, you can plug it into any outlet between 115 volts and 120 volts. The Millermatic 141 MIG welder is a perfect choice for home projects that is safe to run at 120 volts.
How to Install a Welder Outlet: Step by Step Guide
Proper wiring is extremely important when it comes to using equipment, such as the welder. Poor wiring can cause accidents and may be unable to operate the machinery. The quality of the wiring determines everything at the end of the day.
So, here is a step-by-step guide to installing a welder outlet the right way.
What You Need
| 1. Cable Ripper | 8. Wire stripper |
| 2. Adhesive insulation tape | 9. Outlet cover |
| 3. Screwdriver | 10. Safety glasses |
| 4. Electrician’s knife or box cutter | 11. Rubber gloves |
| 5. Rubber shoes | 12. NEMA 6-50P 3-prong 240-volt 50-amp breaker |
| 6. Flush mount gang box | 13. Two-pole or three-pole circuit breaker |
| 7. AVG gauge | 14. The proper length of wiring |
Steps To Follow
Step-1
Safety first before everything else. Put on your safety glasses, rubber gloves, and rubber shoes before getting down to this project. Make sure the main power supply to the breaker box is turned off to prevent accidents.
Step-2
You need to figure out the length of the cable you will need to install the outlet. If the cable is too small, it may overheat and eventually melt the insulation, causing a short circuit.
Check out this table to understand how much wire you need for the designated amperage of the welder –
| Maximum Amperage Draw | AWG Wire Gauge |
| 30 | 10 |
| 40 | 8 |
| 50 | 6 |
| 60 | 4 |
A 6-gauge wiring is enough for a 220-volt welder. In the United States, the 220-volt welders normally use 3-prong plugs. You may want to check the requirements of the country that you are living in.
Two of the prongs support 110 volts each, whereas the third one stays neutral. You MUST connect these three wires the right way, or else things may turn out really bad!
Step-3
Know this general rule: a 220-volt welder of 40 to 50 amps needs a 50-amp circuit breaker. On the other hand, a 110-volt welder of 20 to 30 amps needs a 30-amp breaker.
Take off the breaker box panel and expose the circuit breaker. Examine the terminals by pulling off the circuit breaker from the slot. Strip off the sheath of the 3-wire cable with the cable ripper to uncover the three inner wires.
Word of Caution: Do not touch the large black cables that are connected to the main circuit breaker unless you want to die.
Step-4
Dismantle the insulation of the white neutral wire and two of the hot wires by ½ inch. Now, hasten the cable into a cable clamp so that inside the box there is only an inch of outer sheathing and a foot of inner wire.
Choose a new terminal for your white neutral wires. Then, install the black and red hot wires into the two terminals located inside the box. Make sure the terminal screws are tight.
Step-5
Insert the circuit breaker into any slot inside the breaker box along with the hot wires. The other wires should be pointing in the same direction. Now, split the circuit breaker into place.
All the hot wires must be placed away from the hot bus bar. Cover up the box’s panel, and screw back any screws.
Step-6
Thread the 3-wire cable through the wall or any electrical conduit that is mounted on the outer side of the wall. The faceplate and plug receptacle of the 50-amp NEMA 6-50P outlet must be mounted in front of the box.
Install the box either in the wall or in an external box by screwing the gang box into the stud. Also, cut out a rectangular wallboard for the cover of the outlet. Insert the cable into the main input and output hole.
Take off 6 to 8 inches from the outer sheath of the cable, and ½ inch of insulation from each of the wires. Afterward, connect the two hot wires into the right and left terminals of the 6-50P plug. Finally, do not let the wires touch each other inside the receptacle box.
Step-7
The last step is to check whether the job is perfectly done or not. Turn on the main power supply. Plugin the welder and weld a small piece of metal.
What is a Regular Outlet?
A regular outlet, commonly found in households and commercial spaces, refers to a standard electrical receptacle designed to supply power to various everyday devices and appliances. In the United States, a typical regular outlet is a 120-volt receptacle with two vertical slots and a grounding hole.
This configuration is often referred to as a NEMA 5-15R outlet, indicating a 15-ampere rating. Standard household outlets are primarily intended for low-power devices such as lamps, chargers, and small appliances.
In other regions, the design and voltage of regular outlets may differ, but they generally serve the same purpose of providing a convenient source of electrical power for common electrical devices.
However, it is not uncommon to find homes that use a 20-amp socket to operate heavy appliances. This outlet has a different shape and forms a T-shape sideways. It is the most suitable for the dishwasher, washing machine, and space heaters.
Typically, the voltage in a 15-amp outlet is 120 volts. You can find this type of outlet anywhere in the market, and it is also quite cheap.
On the contrary, the 20-amp outlet can be either 125 volts or 250 volts. To differentiate between this one and the 15-amp outlet, notice the tiny horizontal slot beside the vertical ground slot. The 250-volt outlets are suitable for use with air compressors, air conditioners, and hobby shop equipment.
What Outlet Do I Need for a Welder?
A 220-volt welder can do with a 50-amp breaker and possibly a heavy-duty outlet that contains 3 prongs. The 50-amp circuit breaker requires a 6-gauge wire, so make sure that is happening.
You would not need a neutral wire with the welder. You may need it only in a single-phase system. Since most regular outlets are 3 phased, the load is balanced, so you do not require a neutral.
Additionally, if you are only thinking about using the circuit, replace the plug with a .6-50 and lodge a replaceable that is 6-50R.
Furthermore, if your welder works at 30 & 40 amps input, then you will need a different set of support systems.
Frequently Asked Questions
1. Can I Run a Welder at Home?
2. Do You Need a License to Weld at Home?
3. Can You Weld in the Garage?
4. What are the Outlet Requirements to Run a Welder in the Garage?
5. Do welders need a special outlet?
Most welders operate on a 240-volt circuit, and the outlets designated for them are distinct from standard household outlets.
6. Is it safe to use a welder at home?
You must properly ground the welding machine to prevent electrical shock and Regularly inspect and maintain your welding equipment.
7. Can you plug a MIG welder into a regular outlet?
8. How much power do I need for a welder?
TIG welders can operate on both 120V and 240V circuits. And Flux-cored arc welders typically operate on 220V to 240V circuits, with amperage requirements ranging from 30 to 300 amps.
9. Can you use a welder on a 13amp plug?
Lastly
So, I hope you are satisfied to know that you can plug in your welder into a regular household. Now, you do not have to borrow someone’s work space to get your welding work done. Just remember to use a welder that your household outlet can support.
Related Posts